Summary: Do you know it is easy to move/transfer Outlook data from one system to another if you have access to your Outlook profile? For any reason, you cannot access your Outlook profile, the data become orphan. Thus, transfer Outlook data to another computer can become complex. The article outlines the significant steps you can do to move Offline Storage Table to your system without losing quality. Here, we suggest you the best way to extract OST databases to save to a new system. All properties of OST files can export to the new system without modifying quality.
Reasons Why Do Users Want to Move IMAP OST files to New Machine
There could be several reasons that induce users to transfer OST data to a new system. Here we have listed reasons collected from various tech forums. We hope that you can relate the problem with your situation.
- You system becomes old and want to change it with a new one. In this situation, you want to move Outlook data from one system to another.
- You have a plan to move from Windows to Mac system. In other words, you want to export Outlook for Windows data to Outlook for Mac.
- You want to improve your system speed by segregating the data to another system.
- For a reason, you want to access important contacts, emails and events in a new system.
Do you find any reason related to your reason to move OST data to a new system? If you don’t, you can share your reason in the comment box. We love to hear from you.
Remember, OST is a device and Outlook profile specific file format. OST file data is the exact of your Exchange account data. It saves to your local folder. If your Exchange account is inaccessible, you cannot open its OST files. Moreover, you cannot transfer OST data to a new system because the file will not work and become inaccessible. Therefore, the best solution is export OST files to Outlook PST and then change from one system to another.
Steps to Transfer Transfer IMAP OST files to New Computer
Here we provide the essential steps you can consider to export OST to a new system. We have divided the process into four categories so that you can export OST to a new system without facing technical issues.
Step 1: Export Offline data file (OST)
Step 2: Transfer PST file to the new computer
Step 3: Create a new Outlook profile on a new computer
Step 4: Import data to the Outlook profile on your new computer
Note 1: During conversion through a manual approach, the folder properties with Outlook settings can exploit. It preserves only mailbox quality.
Note 2 : You cannot take help of the Outlook’s Import and Export Wizard if the Outlook profile is inaccessible, damaged, or corrupted. In this situation, OST files become orphan
Orphaned OST files are inaccessible. You cannot access them until you convert OST data files to outlook PST. Therefore, you can consider a professional application such as WholeClear Exchange OST Converter. It is one of the most sophisticated applications to install and run on your system. You don’t need installation of Outlook. Before conversion, the app repairs OST files to convert into PST.
Download the free trial version of this application to understand its functions and how valuable the program is for you. After that you can decide to get its license.
Step 1: Exporting Offline Storage Table to PST
Export Outlook Items to PST in Outlook 2013, 2016 and 2019
- Go to the File menu after accessing your Outlook 2013, 2016, or 2019, and then Open & Export > Import/Export.

- A new Import and Export Wizard will open and choose here Export to a file and then hit the Next tab.

- A next window will open, asking you to choose Outlook Data File (.pst) and then press the Next tab.
- Now, you can choose the folder that you want to import and check the ‘Include subfolders’ checkbox and press the Next tab.

- In the next step, you will select the ‘Browse’ button to save the new PST file. Here you can use the existing PST file to save also.
- After this, press the ‘Finish button and then ‘OK’.
Export Outlook Data to PST in Outlook 2010
- In Outlook 2010, the export process is a bit different. Go to the File > Info and then Option as you can see in the image.

- Press the ‘Advanced’ button and then the ‘Export’ button to access the Import Export wizard.

- Select ‘Export to a file’ and click ‘Next.’

- In the next window, select the ‘Outlook Data File (.pst)’ option and press the ‘Next button.’

- Now, you can choose the folder of your choice and check the ‘Include subfolders’ checkbox to export all mail items. Press the ‘Next’ button after this.
- Press the ‘Browse’ button to save the file locally and press ‘OK.’ Here you create a new PST file.
- In the end, press the “Finish” tab to complete the process.
Step 2: Copy Outlook Data File to New Computer
As you know OST files become inaccessible to a new system. For this reason, you export OST data to PST. If you have orphaned OST files, you cannot use the above method. In this situation, you have only one option and that is using a professional application.
WholeClear IMAP OST to PST Converter is a professional utility to download on your system. The application exports selective OST files to PST. It exports inaccessible OST data to PST without losing integrity.
The conversion program repairs OST files and then uploads them to convert to PST. The whole process is simple and fast. You don’t require Outlook installation to run the program on your system.
Steps to Follow
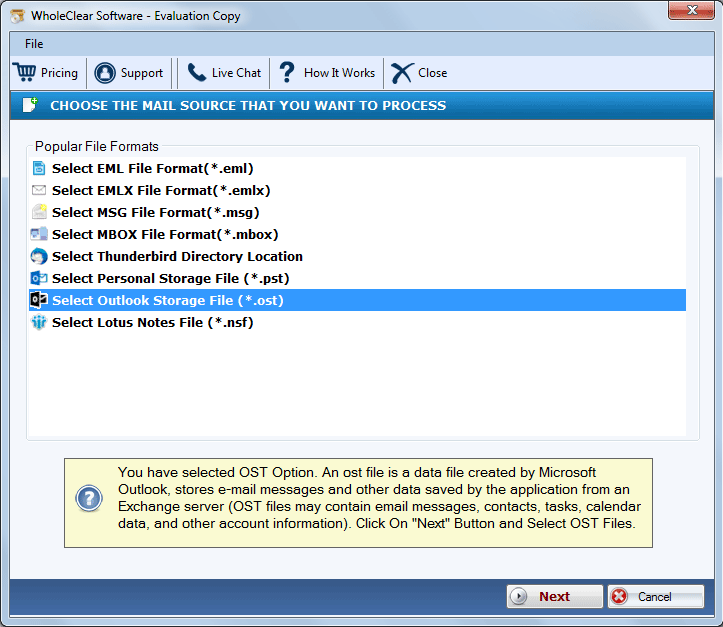
- In the first process, Click on the, select the OST file from the list and press the Next button.

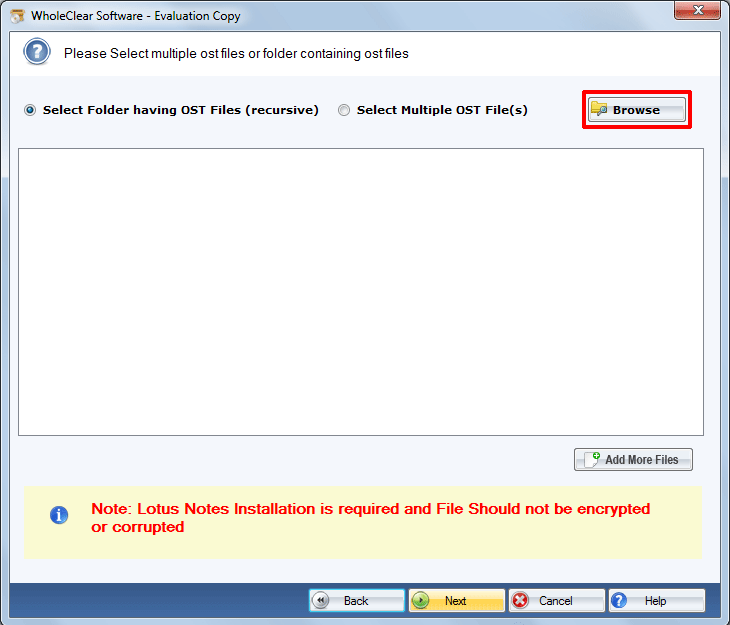
- Now, click on the “Browse” button to upload the locally saved OST file after applying the filtration mode- “File Mode” or “Folder Mode”

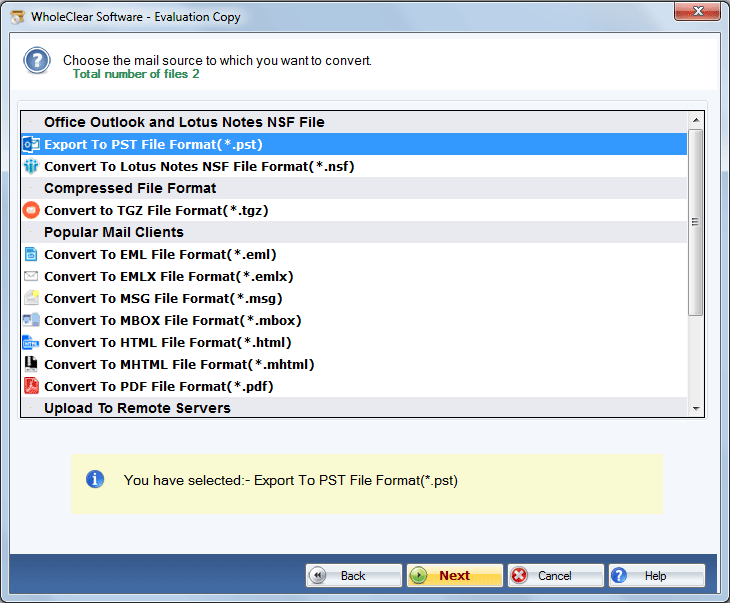
- After this, choose the export file format “PST” press the next tab

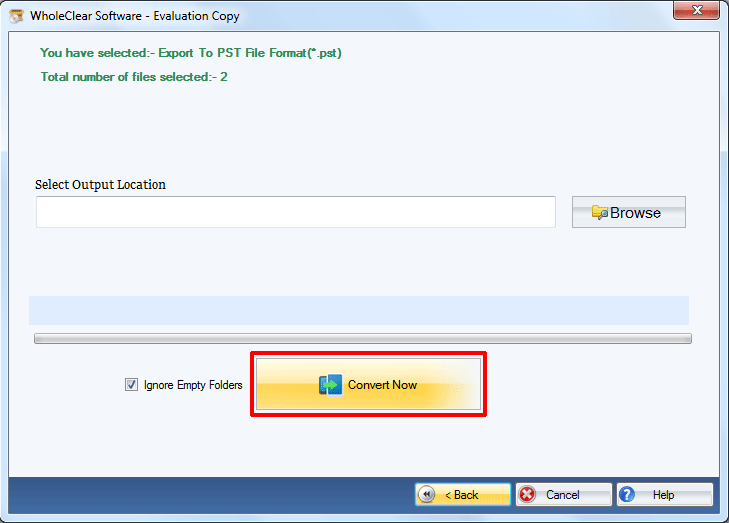
- In the next step, you will select the “Browse” button to save data locally.

It is an easy process. It doesn’t consume time. After conversion of OST to Outlook, you can shift Outlook data to your new system.
Read More:- Fix “Outlook OST file has reached the Maximum Size”
Step 3: Setting up the Profile of Outlook on Your New Computer (Optional)
You can skip the step if you want to save the PST file into an existing Outlook profile on a new computer. If you want to create a new Outlook profile, the following method is for you.
- First, you click on the Windows + R button and write down Outlook.exe /manage profiles.
- After this, press the ‘Add’ button and give a unique name to your profile.
- Now, you will provide the account credentials
- Select Existing Outlook Data File and browse the PST file you transferred to your computer.
Click ‘Next‘ and then ‘Finish‘.
Last Words
Overall, OST files are not meant to transfer from one system to another. PST is the best alternative to OST files. If you want to transfer IMAP OST files to New Machine, OST files to Outlook PST conversion is essential.

